Archive for the 'history dish mondays' Category

Page 2 of 3

History Dish Mondays: Huguenot Torte

You are gonna love this torte.

I first heard about the Huguenot Torte when paging through my most recent issue of Cuisine at Home. The photos promised a luscious-looking apple and pecan treat, that “…Hails from the Ozarks, but was popularized in South Carolina by French Protestant immigrants known as the Huguenots.” An apple dessert that also has a historical provenance? Excellent.

Then I came across the same recipe in the pages of The First Ladies Cookbook, who listed it as one of Martin van Buren’s favorite dishes. “Well, if MVB likes it,” I thought, “It has to be good!”

As it turns out, this dish had little to do with the Huguenots, and nothing at all to do with our eigth president.

While researching a little further into the history of the Huguenot Torte, I can across this article in the New York Times. The article is part of a larger feature called Recipe Redux, wherein the author revisits recipes that were printed in the Times in years past. Huguenot Torte first appeared in the paper in 1965: “The Times’s recipe came from “The First Ladies Cook Book,” where it is featured in the chapter on Martin Van Buren — a historical impossibility because the dessert was created nearly 100 years after his term.”

According to culinary historian John Martin Taylor:

“…The torte descends from a more recent Midwestern dessert called Ozark pudding. Huguenot torte, Taylor said, first showed up in print in 1950 in “Charleston Receipts,” a successful community cookbook in which the torte recipe was attributed to Evelyn Anderson Florance (then Mrs. Cornelius Huguenin). In the 1980s, Taylor tracked her down in a nursing home and discovered that she had eaten Ozark pudding on a trip to Galveston, Tex., in the ’30s. After fiddling with the recipe, she renamed it Huguenot torte after Huguenot Tavern, a Charleston restaurant where she made desserts. The tavern became known for the torte.”

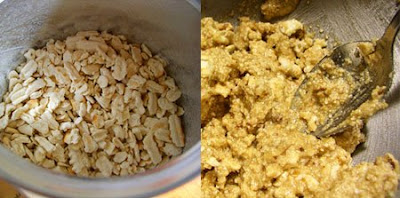
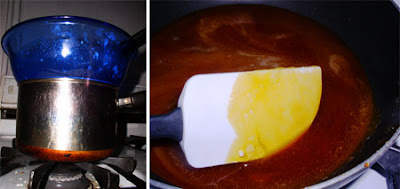
I don’t hold the untruths that have been propagated about the Torte against it, because in actuality, this torte is one of the most amazing desserts I’ve ever had. It takes advantage of the fall apple harvest and is incredibly simple to put together. It has very little flour and a lot of eggs and sugar, which results in the most fascinating texture combination after it is baked: the top is the crustiest, crispiest meringue, while the inside is gooey, buttery caramel.

This dessert is astounding and due for a revival; in fact, I bet Martin van Buren would have loved it, had he been alive when it was created.

***
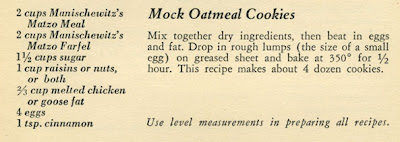
Huguenot Torte (1930s)

Ingredients taken from The First Ladies’ Cookbook (1965)
Directions inspired by Cuisine at Homemagazine (2009)

1 cup peeled and chopped tart cooking apples
1 cup coarsely chopped pecans
2 eggs
1 1/2 cups sugar
1 teaspoon vanilla
4 tablespoons all-purpose flour, mixed with
2 1/2 teaspoons baking powder and
1/2 teaspoon salt
1 cup heavy cream, whipped with 2 tablespoons sugar and 1 teaspoon almond extract.

1. Preheat over to 325 degrees. Grease a 9 x 13 inch baking dish; or line it with parchment paper.

2. Beats eggs and vanilla at high speed. Add the sugar a little at a time, until the eggs are light and creamy, about five minutes.

3. Whisk together flour, baking powder, and salt. Mix into egg mixture until just combined.

4. Fold in apple and pecans.

5. Pour into baking dish. Baked torte 35-45 minutes, until the top is golden brown.

Cool five minutes and serve warm, cut into squares. Don’t get stressed out when the Torte crumbles as it is dished out; that’s its nature. A dollop of lightly sweetened, almond flavored whipped cream is an excellent compliment. This Torte tastes even better the next day, after being warmed a few minutes in the oven.

History Dish Mondays: Peach Brandy

I have long dreamed of making peach brandy from scratch, a key component of my favorite summer-time drink: The Mint Julep. Too long have I made-do with “Mr. Boston.” The time is right for plump, ripe peaches, so I am seizing the day and attempting to infuse my own peach brandy.

I consulted Jerry Thomas for guidance:

I took two large, very ripe peaches, and smushed them up good, skins and all , with the bottom of a rocks glass. I spooned them into a mason jar, and then filled the jar with brandy to the top. I mixed it around a little bit to ensure a happy marriage of brandy and peach. Thomas recommends letting the mixture macerate for 24 hours, which means in the future this mixture could be made on relatively short notice. However, I’m going to Alaska tomorrow morning for two weeks. How could letting it sit a little longer possibly hurt? It could only improve the flavor, right??

So I’ve just covered the jar, and pushed it to the back of the fridge. See you in two weeks, Peach Brandy! When I return, I will strain the liquid, and mix some cocktails.

History Dish Mondays: Little Citron Puddings


I did more research on the uses of American citron (see my previous post), and discovered it tended to be used in the same way as many candied fruits: in cakes (particular wedding cakes) and cookies. I came across the recipe for Little Citron Puddings, which seemed unique but not out of the ordinary, and relatively simple to make. I decided to give it a whirl.

The next day, I took a teacup of custard out of the fridge and gave it a taste. At first, I thought the citron didn’t offer any flavor except gelatinous and sweet. But after trying a few bites of custard sans citron, I realized it really did add some depth of flavor that I couldn’t quite put my finger on. The custard was a good consistency, the nutmeg delightful, and the tea-cup container pleasing and convenient. However, it just wasn’t really…good. It lacked a certain something, and the texture of the citron was a tinch repulsive.
I’m thinking that American citron is one of those Victorian dishes I just can’t get behind. But I’d be curious to try the same methods with a real citron, to see if it’s more flavorful.

History Dish Mondays: Deviled Egg Salad

Recently, my Mom read that passing down cookbooks from mother to daughter is a way of preserving a family’s history. So in that vein, she gifted me with two cookbooks that my grandmother received as wedding presents in the 1940s: The Settlement Cookbook and the Watkins Salad Book.

My mother tapped the books. “Every time we made peanut butter cookies, it was always from The Settlement Cookbook.” she said. “Every time we made deviled eggs, it was always, always from the Watkins Salad Book.”
True to her word, when I paged through the Watkin’s Salad Book back in NYC, I found a permanent bookmark glued to the page for “Deviled Egg Salad.”
Deviled eggs are a food I always associate with summer cookouts. So with the Fourth of July right around the corner, I thought I’d share with you my family’s recipe.
***
Deviled Egg Salad
From the Watkins Salad Book (1946) by Elaine Allen
6 hard boiled eggs
1/4 tsp Powdered Mustard
1 tsp vinegar
1 tsp melted butter
1/4 teaspoon ground red pepper
1/4 teaspoon Salt
Mayonnaise
Paprika
1-2 tablespoons Diced sweet pickles (optional)
I hard-boil my eggs according to Martha Stewart’s instructions, which I’ve found to be the best.
1. Slice the eggs in half and scoop out the yolks. Place the yolks in a bowl.
2. Mash up the yolks with seasonings, vinegar, butter and just enough mayonnaise to moisten. Season to taste–I did not have ground red pepper, so I used Cayenne pepper, which was equally as good. Mix in diced sweet pickles.
3. Refill egg whites using a spoon or pastry bag. Sprinkle with paprika and chill.
Serve and enjoy!
***
For more on deviled eggs, including history and recipes, visit The Deviled Egg Gourmet.

History Dish Mondays: American Citron

A sweet preparation of American citron.

There’s a recipe I come across again and again in 19th century cookbooks: Citron, or American Citron. The earliest recipe appears in the first American cookbook, American Cookery by Amelia Simmons:

Citron, I’ve discovered, is a cirrus fruit native to southern Asia. The pulp is inedible; instead, the rind is cut up and preserved. I supposed it was generally unavailable in early America, so watermelon rind was used as a substitute.
I found a few recipe in later 19th c cookbook that suggest brining citron, like a pickle. So I decided to make two batches, a sweet preparation and a savory.
***
American Citron (sweet)
From American Cookery (1796) by Amelia Simmons.
1 quarter watermelon, fruit and skin removed, sliced into 1 inch chunks
1/2 cup sugar.
Place watermelon rind slices and sugar into a pot, cover with water, and bring to a slow boil. Boil for about two hours, or until tender. Pour into a canning jar and seal, cool in refrigerator for at least two hours.
American Citron (savory)
Based on a recipe from Martha Stewart’s Everyday Food
1 cup white vinegar
1/2 cup sugar
1 tsp salt
1/4 tsp celery seed
1/4 tsp mace
Bring ingredients to a boil, stirring to dissolve sugar. Arrange rind slices in a jar. Pour hot brine into a jar until rind is completely covered and seal jar. Refrigerate until cool, about two hours (or up to 1 week).
***

For canning, I used an old spaghetti sauce jar and a canning jar that some face cream came in (I washed it). When I opened up the jars the next day, I was surprised to find that the steam had created a tight seal on both jars, including resealing the spaghetti sauce jar. I’ve never canned before, so these things amaze me. I sampled both citron preparations: the preserved citron was soft and almost completely transparent. It tasted like sugar melon and feet. The pickled citron was crunchier, but also a little slimy. I remembered reading some 19th c recipes that warned against the slime, and recommended soaking it in a brine, rinsing it, and brining it again to get rid of it. My bad.

The odd part about citron is that there are many more recipes for preserving it than how to eat it, or what to eat it with. Now that I’ve successfully made citron, I have to figure out what the hell to do with it.

American citron, brined.

History Dish Mondays: Featherballs

You are gonna love these balls.

This week, in my ongoing Jewish-American cooking project, Ilana and I are attempting Featherballs:

Featherballs are essentially matzo balls, but are unique in the fact that they are flavored with nutmeg or ginger. My friend and cohort Ilana pointed out that ordinarily in matzo ball soup, it’s the broth that is the most flavorful, and the matzo balls added as filler. In this recipe, the flavor of the matzo balls are brought to the forefront. Additionally, these balls do have a light and fluffy texture–but we’ll get to that in moment.
I journeyed to Brooklyn to meet with Ilana and her boyfriend Jed, for a lesson in Matzo balls. They filled me in on some matzo ball facts: That they were normally made with butter or margarine, so they anticipated this recipe to be much richer, and possibly heavier. Additionally,
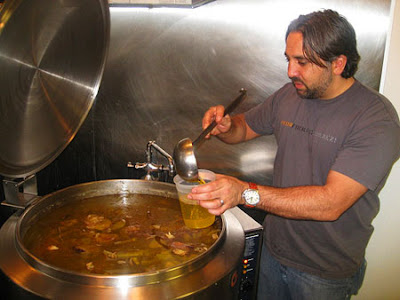
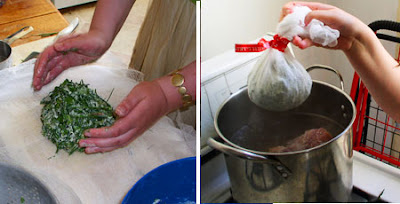
most New York matzo balls are fist-size, like the ones you’ll find at Katz’s or the 4th Ave. Deli. These featherballs were to be rolled the size of walnuts. Their are also two types of matzo balls–the light “floaters” and the dense “sinkers.” Neither are wrong, just a personal preference.
We whipped the eggs and the schmaltz until each were fluffy, then combined them and added the dry ingredients. We split the dough between two bowls, and flavored half with nutmeg, and half with ginger. The dry ingredients were added, and mixed by hand until just combined. Jed warned us that over mixing the ingredients would result in a matzo ball as hard as rock.
Jed also said that with most matzo ball recipe, you let the batter chill first, and then roll the balls. In the recipe, you roll first and then chill. We shrugged and followed the recipe.
While the matzo balls chilled in the fridge, Jed cooked some carrot slices in chicken broth. We used boxed broth, but one of the cool things about this recipe is it written for a home cooked soup: you would make you soup, skim the chicken fat off the top, add the fat to the matzo balls, and cook the balls in the soup. Jed also noted that the carrots are essential; they help to break up the saltiness of the broth and the matzo, and gives your palette a rest.
The featherballs are dropped into boiling chicken broth.
When the broth came to a rolling boil, we dropped the featherballs in and covered the pot. 18 minutes later they were done. Be careful not to cook them too long–they begin to fall apart in the water. Some may be a little underdone in the middle, which is fine. We turned off the burner and served us up a bowl of featherballs.
I have to admit, I have no basis of comparison, these being perhaps the second matzo balls I’ve had in my life. But I did think they were really good. Jed and Ilana have grown up on matzo. The three of us agreed the texture was great–Jed and Ilana said much less dense than an ordinary matzo ball. It was light, but also very hearty. After eating four, we were full.
We couldn’y taste the ginger in the featherballs, although they were still salty and good. The nutmeg taste was present, and they were deigned the favorites by Jed and Ilana. For me, it was hard. I associate the taste of nutmeg with dense cakes of the 1850s, and it was difficult to get out of the mindset. We speculate that mace (the spicy out shell of a nutmeg) might also make a good featherball.
The featherballs were really perfect. Ilana hit the nail on the head: “These are the best matzo balls I’ve ever had. I think we’ve really rediscovered something.”
In the coming weeks, we plan on doing one more Jewish cooking day based on our Manischewitz cookbook. Ilana and Jef will handle savory dishes (pumpkin pancakes, tamales, asparagus wheel) and I’ll attack sweets (boston pie, orient cake, farfelroons). I will keep you updated as to our progress.

History Dish Mondays: Cooking with Schmaltz, Part One

Chicken cookies triumphant.


I’m embarking on a new project with my friend Ilana. While at her bubbe‘s for Passover, Ilana came across a Manischewitz Matzo Meal cookbook from 1930. It was printed both in Yiddish and in English, and the recipes were in a similar vein, featuring Kosher preparations for America classics such as Boston Cream Pie.

I had remembered reading about these duel-language cookbooks in Laura Schenone’s book 1,000 Years Over a Hot Stove. Schenone writes:
“As the 20th century marched on, many Jewish women felt comfortable assimilating through the table, partaking in the fruits of American technology and convenience and all its symbols of progress. It was possible to do this, they proved, and still remain Jewish in identity, soul, and even according to religious law, if they wished.”
The assimilation of Jewish immigrants through food seemed to be happening largely from 1900-1935 and it resulted in an unique cuisine that was simultaneously traditionally Jewish and modern American. Product cook books, like the one printed by Manischewitz, seemed especially intent on creating this modern, hybrid woman.
So we got curious what these recipes tasted like. Ilana and I perused Tempting Kosher Dishes, and selected a few recipes that seemed like the best examples of the hybrid cuisine. This week, I’m cooking up a batch of Mock Oatmeal Cookies:

Yes, these cookies are made with “melted chicken fat.” Chicken cookies.
***
Mock Oatmeal Cookies
From Tempting Kosher Dishes, B. Manischewitz Co., 1930
2 cups matzo meal
2 cups matzo farfel
1 1/2 cups sugar
1 cup walnuts
2/3 cup schmaltz
4 eggs
1 tsp. cinnamon
1. Preheat oven to 350 degrees.
2. Cream together the schmaltz and the sugar. Add eggs one at a time, beating well after each one.
3. In a separate bowl, stir together cinnamon and matzo meal. With the mixer on low, slowly add the matzo meal. Mix until combined.
4. Stir in the walnuts and matzo farfel. Drop teaspoon sized lumps onto a greased or silicon cookie sheet.
5. Bake 15 minutes, or until bottoms are golden brown. Cool and enjoy.
**note: I would recommend doubling the amount of walnuts (or raisins) and adding 3/4 salt to the matzo meal.
My lips had never touched schmaltz until I moved to New York. Traditionally Jewish, it’s chicken fat, used to replace butter when necessary according to Kosher laws. It’s commercially available, but traditionally skimmed off the top of stock. I was having a hard time getting my hands on it in my largely Greek and Hispanic neighborhood. But fortune smiled, and while out on a video shoot, I brought up my search for schmaltz to food journalist (and schmaltz advocate) Josh Ozersky and chef Marco Canora of Hearth and Insieme. We were on our way to Insieme, when Marco mentioned he had just cooked up a pot of chicken stock, and would be more than happy to skim me some schmaltz from the top. I was beyond thrilled–looks like I owe Marco some Mock Oatmeal Cookies.
Marco skims for schmaltz. What a great guy.

Matzo Meal is ground Matzo; while Matzo Farfel is crushed or crumble Matzo. It’s worth it buying it in canisters as opposed to breaking up Matzo crackers. It’s cheaper and saves time.
I mixed this recipe as I would a normal cookie dough, although this batter was definitely thinner. By mixing in the Matzo Farfel at the very end, it stayed crispier, and added more texture. I left out the raisins, because I hate fruit in my cookies. I sampled some of the dough before popping it in the oven: It had a disturbing chicken aftertaste.
Left: Matzo farfel. Right: Mock Oatmeal Dough.

A half hour was far too long a bake time for these cookies, and I burned my first batch. The second batch I baked 15 minutes, and they came out perfectly brown on the bottom. I offered one to my roommate without telling him what was in it.
The verdict? Well, we both ate two. The chicken aftertaste had somehow baked away. They had a great texture, similar to a scone: crisp on the outside, and surprising soft and cake like on the inside, despite the lack of leavening. The matzo farfel really crunched and popped in you mouth. It would be a good cookie with a cup of coffee.
I did find the cookies needed a bit of salt; I would probably add 3/4 tsp the next time I made them. Adding more walnuts wouldn’t have hurt either.
In fact, I would make these cookies again. I think they’re made even more appealing because of their unique origins. Not bad for a cookie that started off smelling like chicken soup.
Next week, Featherballs: a matzo ball seasoned with ginger or nutmeg, fried in schmaltz.

History Dish Mondays: The 8,000 Year Old Recipe

Nettle pudding.

Nettle pudding has been declared Britain’s oldest recipe. From Epicurious.com:

Not helping the culinary reputation of their countrymen at all, British archaeologists and food experts have announced what they say is the U.K.’s oldest recipe, an 8,000-year-old list of instructions for nettle pudding–or as we might dub it in the present day, weed glop.”

***

Nettle pudding

Original recipe from Daily Mail UK Online

Ingredients
2 bunches of young nettle leaves
Any combination of 4 wild greens, such as:

bunch of sorrel
bunch of watercress
bunch of dandelion leaves
Some chives

1 cup of barley flour
1 teaspoon salt

Chop the herbs finely and mix in the barley flour and salt. Add enough water to bind it together and place in the centre of a linen or muslin cloth. Tie the cloth securely and add to a pot of simmering venison or wild boar (a pork joint will do just as well). Leave in the pot until the meat is cooked and serve with chunks of bread.

**

Reading over the recipe, I realized it was made with wild greens that would have been gathered from the cook’s surroundings. So, even though I live in Queens, I decided to make my recipe with wild greens gathered from *my* surroundings.

WARNING! If you don’t know anything about wild plants, you can poison yourself. I grew up in a rural area in a family full of chemists, so I have some background in identifying wild edibles. Don’t try this at home if your only experience involves me, or looking at photos on the internet.

Wild onion sprouts in a housing project.

I got the idea to try hunting and gathering in New York after I saw wild onions springing up in the yards of the Ravenswood Housing Projects. The lawns have gone to seed; which was great for me. On a walk home from my boyfriend’s house, I hopped the fence and snipped some of the green onion tops. This lot was also bursting with violets, another edible plant, but one I didn’t think was appropriate for this particular recipe. I tucked the onions into a plastic bag with a damp towel, so they wouldn’t wilt.

Next I came across a vacant lot, and found another plant I had been searching for: Lamb’s Quarter. I first learned about lamb’s quarter while working on a video with chef Bill Telepan, who also uses wild leeks and ferns in his cuisine.

The lamb’s quarter were just babies, since it’s so early in the season, but they would do. I snipped them and added them to my baggy.

I also squeezed through a locked gate to grab a couple handfuls of what I thought was wild yellow sorrel, but after bringing it home I wasn’t sure. I decided to pitch it, and wait until I had more sorrel information.
Dandelion greens grocery store.

Lastly, I passed by an embankment near the East River and collected some young dandelion leaves. They are best eaten before they flower.
While I was foraging, I really expected to be treated like a crazy person. It’s not often you seen some one picking weeds out of a vacant lot in Queens. But strangely–people went out of there way to be nice to me, and say “hello.” I guess carrying a handful of green stuff = good person in the universal judgement book.

I brought everything home and washed them thoroughly in a colander. I even used a touch of soup. I sampled a few leaves–the onions were especially flavorful and delicious. The dandelions were bitter, but bearable, and the lamb’s quarter was delicate.
Left: Wild onion greens and lamb’s quarter, foraging in Queens. Right: Stinging Nettle

I couldn’t find the recipe’s namesake, Nettle, in the wild. So I stopped by the Paffenroth Gardens stall at the Union Square Green Market and picked up a bunch.

When I got home, I pulled the nettle leaves from the stems (I recommend wearing gloves; they ain’t called stinging nettles for nothing). I then chopped all of my greens finely, and mixed them together.

I was not able to find barley flour in the grocery story; I bought barley in hopes of making my own, but it turns out I need a “grain grinder.” So I substituted a cup of regular flour, and added just enough water to make it wet enough to bind together–about 1/2 cup. I formed it into a ball, and wrapped it in cheesecloth, tying off the end with a twist tie.
Left: Adding flour and water, and forming into a ball. Right: The ball is wrapped in cheesecloth, and dropped into a simmering pot of hot ham water.
I had a ham bone in the freezer, left over from Easter, and I threw that in a big pot of water and let it come to a simmer. I dipped in my cheesecloth encased ball, and let it simmer for an hour.

An hour later, we had what one of my friends described as a “hammy leafy wheat ball.” I told her to be quiet because she was about to put a time machine in her mouth. When I unwrapped the cheesecloth, the pudding was surprising firm and a deep green. I scooped servings onto slices of bread.

The verdict? Not bad. I wouldn’t make it for pleasure, but the taste was surprisingly mild. Any hint of bitterness from the greens was gone, and they were all very tender. The dish was also very filling: my friends and I ate our whole servings, then hiked and played 4-square for 5 hours. And we felt good.
I feel like Nettle Pudding was designed to put to good use spring greens, a food that while very nutritious was not very filling on its own. Barley flour would have added even more nutrients to this dish. The dish was also designed to be eating with meat. The pudding helped a small amount of meat go a long way, much in the same way rice or grits are used as a filler.

And I have to say, it was pretty cool to eat something very similar to what people were eating 8,000 years ago.

For more wild greens and ways to cook them, check out my video with Bill Telepan on Nymag.com

And if you live in New York , take a foraging tour with Wild Man Steve Brill.

History Dish Mondays: Burnt Almond Ice Cream

Burnt Almondy Ice Cream Goo.


We’re continuing our ice cream social agenda with Burnt Almond Ice Cream, another flavor pulled form Lincoln’s Inaugural Menu.  This is a custard ice cream, so it’s a little more difficult than what we’ve been making up until this point. And I’ll let you in on the surprise ending: mine didn’t turn out.  It didn’t freeze in the ice cream maker, and it’s currently a Tupperware of goop sitting in my freezer.  I did something wrong in this recipe, I just don’t know what.  The great tragedy is that it TASTES AMAZING.  I think I’ll try serving it as a sauce on top of other ice cream.


At any rate, give this recipe a try, and if your results are more successful than mine, please let me know.

***


Burnt Almond Ice Cream
Original Recipe from the Boston Cooking School Cookbook By Fannie Merritt Farmer

Boston, Little, Brown And Company (1896).


1 1/3 cups sugar (set half aside)
1 tablespoon flour
1/8 teaspoon salt
1 egg
2 cups milk
1 quart cream
1 1/2 tablespoons vanilla
2 cups finely chopped, toasted almonds (or to taste)

1. Mix half the sugar, flour and salt.

2. Add egg, slightly beaten.

3.  Add milk slowly, whisking constantly.

4. Cook over a double boiler (or makeshift double boiler) for 20 minutes, stirring constantly the first 15 minutes.  If you’ve made a custard before, this may not look as think as you think it ought.  But don’t worry, it will thicken up when you add the caramelized sugar.

Left: Makeshift double boiler. Right: Caramelizing the sugar.  Do not try to taste the caramelized sugar by sticking your finger in it; its is very very hot and you will get burned very very bad. Like me.

5. In the last five minutes of cooking time, caramelize the
sugar.  Put the remaining sugar in a non-stick saute pan over a low heat.  Stir constantly.  When the sugar begins to melt, it will caramelize soon after.  You want the sugar to be completely melted and the color of maple syrup. Take care not to burn it.

6.  With the double boiler still on, drizzle a fine stream of the caramelized sugar into the custard, whisking constantly.  As the sugar hit the custard, and might cool slightly and become gooey.  Don’t fret, just keep stirring until the sugar is fully integrated.

7. At this point, you custard will be a dark brown.  Add the cream and vanilla and combine.  Let sit until it comes to room temperature, or place in the refrigerator for an hour or more.

8.  Freeze in an ice cream make according to the manufacturer’s instructions.  I let my ice cream mellow in the refrigerator over night, and then I put it in the ice cream maker for 30 minutes.  It never seemed to freeze; I just tossed the almonds in at the very end and then stuck it in the freezer. tragedy.

History Dish Mondays: Kirschwasser Sorbet

Instead of attempting the Maraschino Ice Cream I had originally planned for my Ice Cream Social, I decided something a little lighter would be in order after all that heavy cream.  So instead, I’m reviving my Kirsch Sorbet recipe from The Devil in the White City Dinner Party. This recipe was a huge hit, so I highly recommend it.  Additionally, it’s important to garnish the sorbet with a good quality cherry preserve.  The sweet and tart flavor of the preserved cherries are the perfect compliment to the sorbet.

***

Kirsch Sorbet
Modern recipe adapted from
The Chocolate Traveler.


½ cup confectioners sugar
½ cup skim milk
½ cup heavy whipping cream
1 cup water
¼ cup + 1/8 cup kirschwasser

Bring the milk, cream and sugar to a boil and simmer until the sugar has dissolved. Remove from heat and stir in the water. Add the kirsch to taste. Pour into ice cream maker and freeze for about 20 minutes.  Transfer the ice cream to an airtight container and freeze until ready to eat. Garnish with cherry preserves.