Archive for the 'baking' Category

Page 2 of 4

Origin of a Dish: Chocolate Chip Cookies

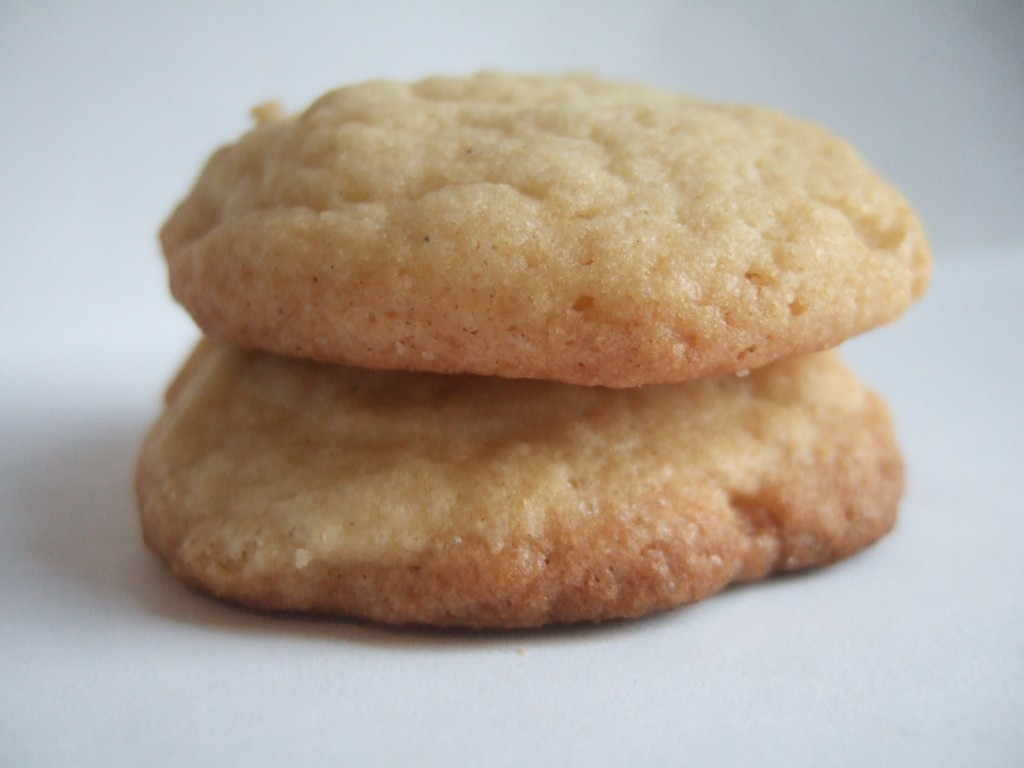
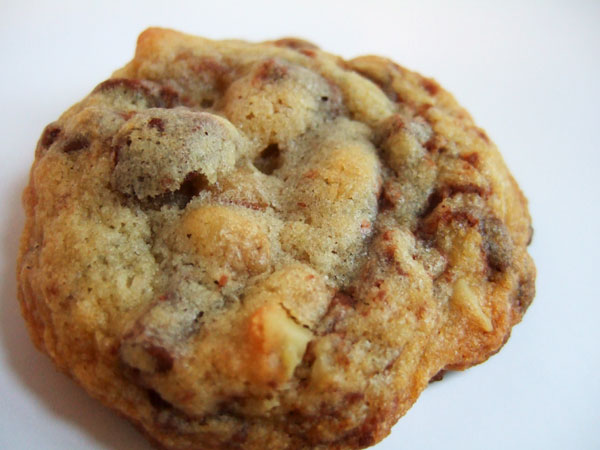
A chocolate chip cookie, baked from the original recipe.

During my recent experiments with chocolate, I got curious about the origins of the ultimate American chocolate dessert:  The Chocolate Chip Cookie.  Keep reading for the original recipe, which, in my opinion, is the perfect cookie.

Ruth Wakefield  is credited for the invention of the chocolate chip cookie at her Toll House Restaurant Whitman, Mass., “…a very popular restaurant that featured home cooking in the 1930s. The restaurant’s popularity was not just due to its home-cooked style meals; her policy was to give diners a whole extra helping of their entrées to take home with them and a serving of her homemade cookies for dessert.” (wikipedia)

The legend of the cookie’s creation goes like this: “Wakefield is said to have been making chocolate cookies and on running out of regular baker’s chocolate, substituted broken pieces of semi-sweet chocolate from Nestlé thinking that it would melt and mix into the batter. (wikipedia)”  I don’t believe this explanation.  Baker’s chocolate doesn’t magically melt into cookie dough, so if Wakefield knew how to work with baker’s chocolate, she would know that a semi-sweet Nestle bar would behave the same way. The legend makes her seem like a foolish little lady that made a silly mistake that magically turned into something wonderful.  I think she was actually an extremely talented cook with a brilliant idea.

Whatever the truth is, she sold her idea to Nestlé in exchange for a lifetime supply of chocolate (or so the story goes; I think she was probablly a smarter business woman than that).  Wakefield’s cookie recipe was subsequently printed on the back of all Nestle’s chocolate bars.  At first, Nestle included “a small chopping tool with the chocolate bars, but in 1939 they started selling the chocolate in chip (or morsel) form.” (wikipedia).

Chocolate chip cookies are The Official Cookie of the Commonwealth in Massachusetts: http://www.malegislature.gov/Laws/GeneralLaws/PartI/TitleI/Chapter2/Section42

Wakefield released a cookbook in 1936, Toll House Tried and True Recipes, which features the original chocolate chip cookie recipe as “Toll House Chocolate Crunch Cookies.”  The recipe, as well as the rest of the cookbook, can be found online here.  Below, here’s the same recipe from the April 26, 1940 Chicago Tribune (from the food timeline)

Here’s a new cookie that everybody loves because it is so delicious, so different and so easy to make. With each crisp bite you taste a delicious bit of Nestle’s Semi-Sweet Chocolate and a crunch of rich walnut meat. A perfect combination. Here’s a proven recipe that never fails. Try it tomorrow.
1 cup butter
3/4 cup brown sugar
3/4 cup granulated sugar
2 eggs, beaten whole
1 teaspoon soda
1 teaspoon hot water
2 1/4 cups flour
1 teaspoon salt
1 cup chopped nuts
2 Nestle’s Semi-Sweet Economy Bars (7 oz. ea.)
1 teaspoon vanilla
Important: Cut the Nestle’s Semi-Sweet in pieces the size of a pea. Cream butter and add sugars and beaten egg. Dissolve soda in the hot water and mix alternately with the flour sifted with the salt. Lastly add the cholled nuts and the pieces of semisweet chocolate. Flavor with the vanilla and drip half teaspoons on a greased cookie sheet. Bake 10 to 12 minutes in a 375 degree F. oven. Makes 100 cookies. Every one will be surprised and delighted to find that the chocolate does not melt. Insist on Nestle’s Semi-Sweet Chocolate in the yellow Wrap, there is no substitute. This unusual recipe and many others can be found in Mrs. Ruth Wakefield’s Cook Book–“Toll House Tried and True Recipes,” on sale at all book stores.”

A modernized version of this recipe can be found on the Nestle website, here.

The biggest problem in recreating the original recipe is the chocolate; I felt that chopping up a candy bar was an important part of the original process.  But nowadays, Nestle only makes semi-sweet morsels, not bars.  Nestle still makes milk chocolate bars, which I later found at Economy Candy, but for my first attempt at the recipe I had to use a stack of Hershey’s milk chocolate bars.

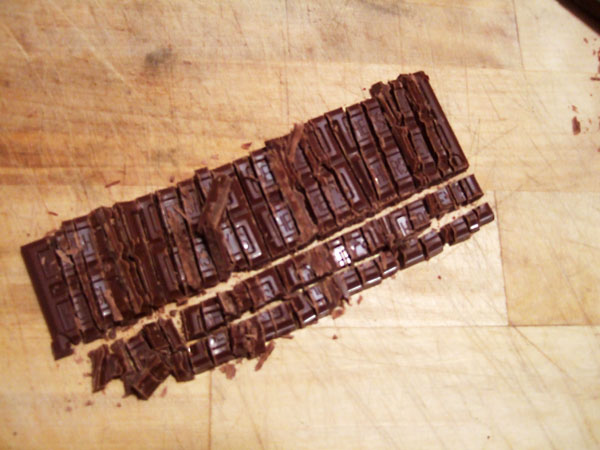
It was much easier to cut up the chocolate bar that I anticipated.  The recipe specified the pieces should be “the size of a pea,” and I tried to remain faithful to that.  I used a large knife and the job was done in short order and with little effort.  The chopped chocolate smelled seductive and got me thinking: why are we restricting ourselves to the bags of chocolate chips in the baking aisle, when there is a bevvy of delicious, interesting chocolate bars available?  Hachez, a German company, makes dark chocolate bars infused with orange, blackberry, mango/chili, and strawberry/pepper.  Mast Brothers Chocolate, in Brooklyn, features a variety of carefully crafted dark chocolate bars of single origin cocoa beans, as well as bars sprinkled with sea salt and ground coffee.  Put that in your cookie dough and bake it.

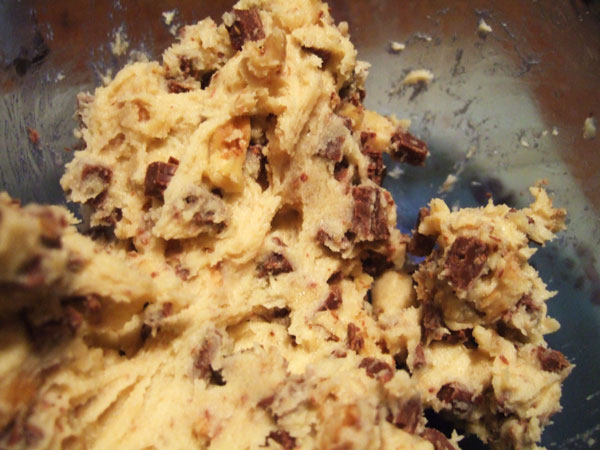
The dough mixed quickly and easily; it was baked and in my mouth in less than an hour.  The first bite of warm, melty cookie made me think of s’mores and brought back a flood of childhood memories.  The cookies were agreed to be perfect by all that sampled them: the best ratio of chocolate to nuts to everything in between.  Everyone was shocked to learn it was the first chocolate chip cookie recipe and wondered why it was ever changed.

For more on chocolate cookies, check out this recipe for one of the first known uses of chocolate in baking.
Chocolate Delight: Tunnel of Fudge Cake

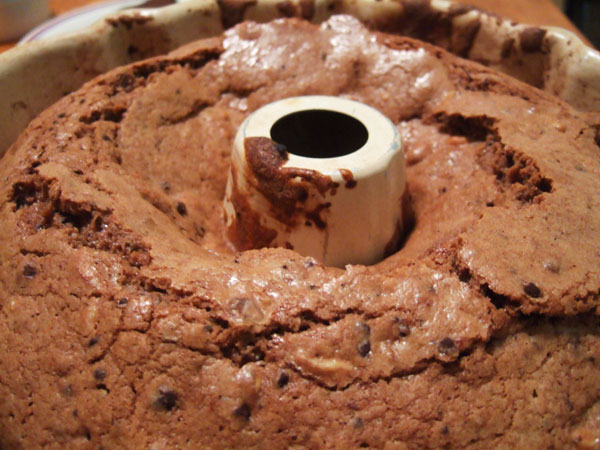
Tunnel of Fudge cake bakes up tall, with a glossy, brownie-like crust.  Break pieces off and eat it; no one will know.

I’m wrapping up Chocolate Delight week with a bang: a cake that has a built-in Tunnel of Fudge.

The legend of this cake was related to me by Jessica, the author of Pictures of Cake.  This cake won second place at the 1966 Pillsbury Bake-off, losing to ‘”golden gate snack bread,”‘  a yeast bread made with instant flour, processed cheese spread, dry onion soup mix and butter.(source)”  Blech.  The snack bread has been long forgotten, while Tunnels of Fudge lives on.

The Tunnel of Fudge cake was a technical revolution: first, it produced a moist cake with a fudgy, uncooked center, perhaps the ancestor of the modern Molten Chocolate Cake.  Second, it used a Bundt pan.  For a little more information on that, take a look at Jessica’s invitation to her ToF Cake party:

Third, this cake is quite possible the least healthy thing I have ever made.  It contains approximately 60 eggs, 1 millions pounds of butter, and 20 cups of sugar.  Originally, it was made with a pre-packaged, powdered frosting mix called Double Dutch Fudge Buttercream.  

Tunnel of Fudge Cake(original recipe)
1 1/2 cups soft Land O’ Lakes Butter
6 eggs
1 1/2 cups sugar
2 cups Pillsbury’s Best Flour (Regular, Instant Blending or Self Rising*)
1 package Pillsbury Double Dutch Fudge Buttercream Frosting Mix
2 cups chopped Diamond Walnuts

Oven 350° [ed. 350 F / 175 C]
10-inch tube cake

Cream butter in large mixer bowl at high speed of mixer. Add eggs, one at a time, beating well after each. Gradually add sugar, continue creaming at high speed until light and fluffy. By hand, stir in flour, frosting mix, and walnuts until well blended. Pour batter into greased Bundt pan or 10-inch Angel Food tube pan. Bake at 350° for 60 to 65 minutes. Cool 2 hours, remove from pan. Cool completely before serving.

Note: Walnuts, Double Dutch Fudge Frosting Mix and butter are key to the success of this unusual recipe. Since cake has a soft fudgy interior, test for doneness after 60 minutes by observing dry, shiny brownie-type crust.

***

After the frosting mix was discontinued, Pillsbury developed a modern recipe which you can find here. This is the recipe I baked from, with a few minor changes that I will include below.

***
Tunnel of Fudge Cake, REMIXXXX

Adapted from Pillsbury.com and
The 17th Annual Pillsbury Busy Lady Bake-Off Cookbook, 1966

2 3/4 cups granulated sugar
1 3/4 cups  (2 and 3/4 sticks) butter, at room temperature
6 eggs
2 1/4 cups flour
3/4 cup unsweetened cocoa
1/4 tsp salt
2 cups chopped walnuts (the recipe notes that “Nuts are essential for the success of this recipe.” ha!)

1. Grease a bundt pan and dust with additional cocoa powder.  Preheat oven to 350 degrees.

2. In a large bowl, whisk together flour, cocoa powder, and salt.  Set aside.

3. Cream together sugar and butter until light and fluffy, about three minutes at medium speed.  Add eggs one at a time, mixing thoroughly after each one.

4. With mixer on low, slowly add dry ingredients.  Scrape bowl, then mix until combined.

5. With a spatula, fold in walnuts.  Spoon batter into bundt pan; bake 45 minutes or until top has a dry, shiny brownie-type crust.  Cool upright in pan on wire rack 1 1/2 hours. Invert onto serving plate; cool at least 2 hours.

***

Can someone please tell me how to get a cake out of a bundt pan?  Mine always comes out in broken, shameful pieces.

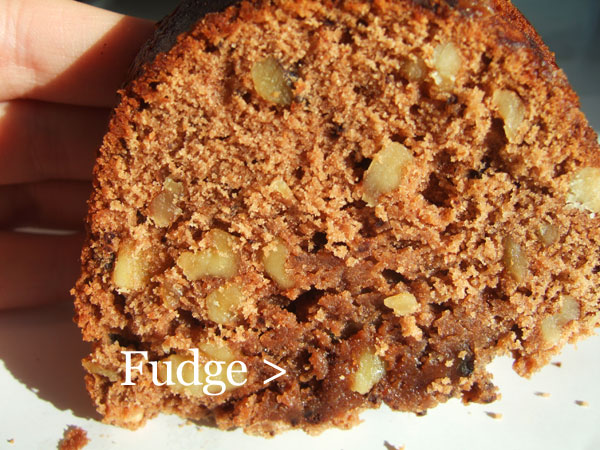
When I cut my cake, it wasn’t puking out fudge like in the 1966 photo; but, running down the middle was a dense spine of goopy fudgeness.  My oven tends to run a little hot, so I think the cake was slightly over-baked: ten minutes less would have allowed a much thicker fudge vein.

The cake was good; the walnuts were a nice break from what would have been a total chocolate assault.  But the cake also had a greasy mouth-feel thanks to the million pounds of butter.  And it’s sooooo swweeeeeet.  I even made it with a cup less sugar than the Pillsbury recipe calls for.

I don’t know.  I’d be curious to have more people give this bizarre chocolate cake a whirl and tell me what you think of the final results.

Chocolate Delight: Chocolate Wafers

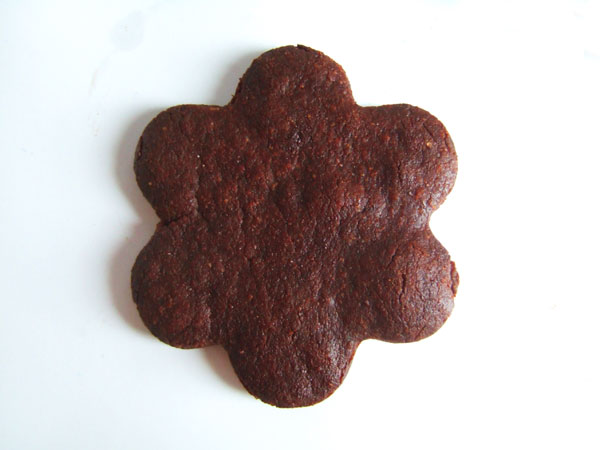
Chocolate Wafer cookies; from Gourmet, February 1950.

Faced with the task of consuming chocolate, I decided to reference a book that I had gotten for Christmas: The Gourmet Cookie Book: The Single Best Recipe From Each Year 1941- 2009. It’s a cool anthology that reflects the changing tastes of the last 70 years.  I wanted a rich, chocolately cookie, and I found this recipe for Chocolate Wafers from Valentine’s Day, 1950:

“Chocolate Wafers: Good cooks were pleasing their menfolks with chocolate cakes back during the early settling of the New England colonies…Modern ways are upon us, atom bombs bedevil our dreams, standardization of taste haunts our mealtimes–but chocolate is still chocolate.”

Intense!  But also inaccurate–chocolate cake recipes didn’t start appearing until the later half of the 19th century.  Just FYI.

***
Chocolate Wafers

From Gourmet magazine, Feb 1950
As Reprinted in  The Gourmet Cookie Book: The Single Best Recipe From Each Year 1941- 2009

3/4 cup Butter, room temperature
1 1/4 cups Sugar
1 tb Rum Extract (I didn’t have any, I used rum)
1 Large Egg
1 1/2 cups Flour
3/4 cup Unsweetened Cocoa Powder
1 1/2 tsp Baking Powder
1/4 tsp Salt

1. Sift together flour, cocoa, baking powder and salt. Set aside.

2. Cream butter.  Add sugar gradually and cream together until light and fluffy.

3. Add egg and rum. Beat thoroughly

4. With mixer on low, gradually add dry ingredients, mixing thoroughly after each addition.

5. When completely mixed, refrigerate overnight.

6. Roll out dough 1/8th of an inch thick; cut into fun shapes; bake in a 375 degree oven for 6-8 minutes.

***

This recipes mixes up very quickly, but the dough is hellish to work with.  It was somehow both dry and crumbly and extremely sticky.  It did allow me to use some of my vintage cookie cutters as well as a vulgar cutter my roommate gave me for Christmas.

The cookies are tasty.  I liked the texture best when they first came out of the oven: they were really crispy and flaky.  They got a little more dense as they cooled, but still very good.  If I was going to make an artisanal Oreo, I would use this recipe.

These cookies are getting shipped off to Washington DC for a friend’s very belated birthday present.  Not the vulgar ones, though.  The balls got a little burned.

Chocolate Delight: Mahogany Cake

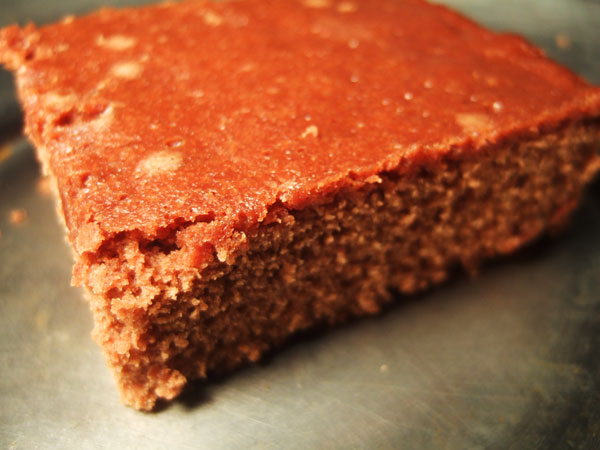
Mahogany Cake: cocoa powder and brown sugar.

Have you ever read A Cake Bakes in Brooklyn?  You should.  Some months ago, the author loaned me a book by a mysterious cake maven named Mrs. Osborne.  Read more about this fascinating woman, with a unique perspective on how to bake a cake, here.

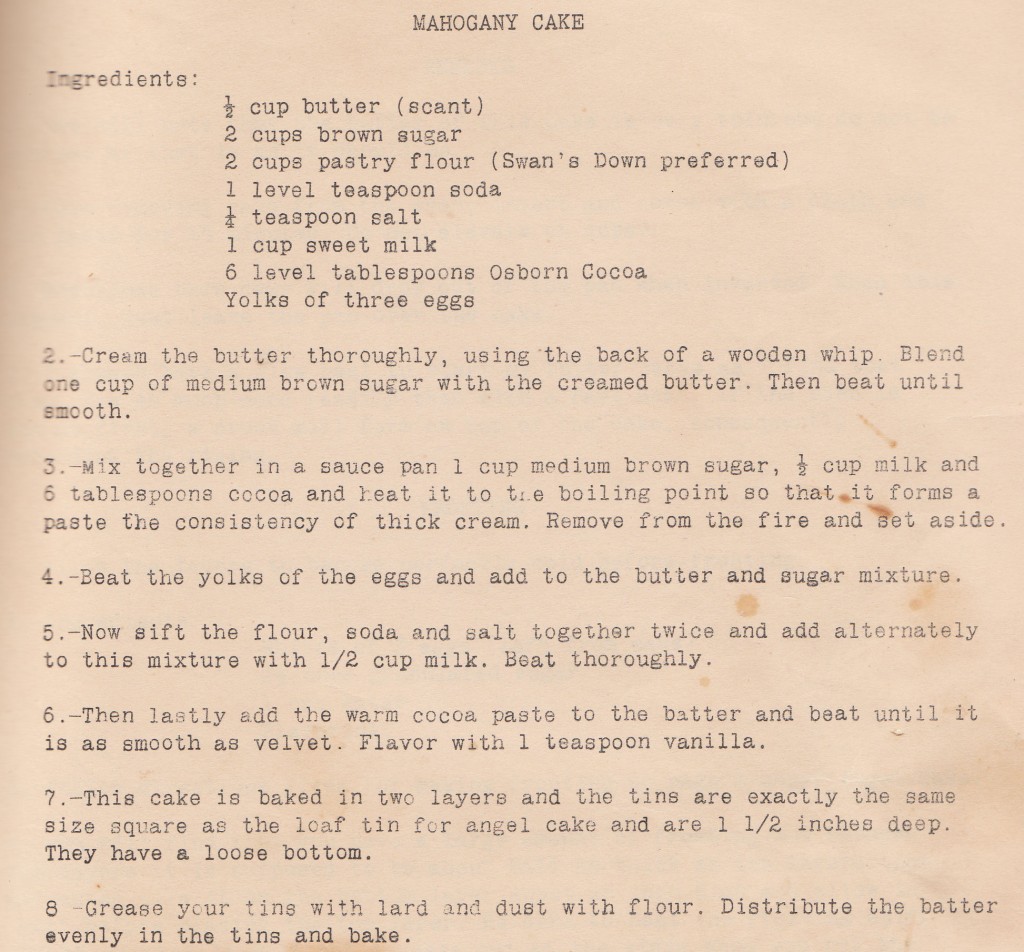
I’ve baked one recipe from Mrs. Osborne’s book, a fairly unsuccessful Puff Cake.  But another recipe captured my attention, a brown sugar and chocolate confection called Mahogany Cake.

***
Mahogany Cake
From Mrs. Osborne’s Cakes of Quality, by Mrs. Grace Osborne, 1919.

I didn’t have the pans she wanted, so I baked it in a regular rectangular cake pan, which I buttered and dusted with cocoa powder.  The milk, sugar and cocoa powder comes to a quick boil, so watch out for that.  After I mixed the flour in, the batter was super smooth; when the melted chocolate was added, it was very velvety, just like Mrs. Osborne promised.  Don’t forget the teaspoon of vanilla at the end; she doesn’t list it in the ingredients.

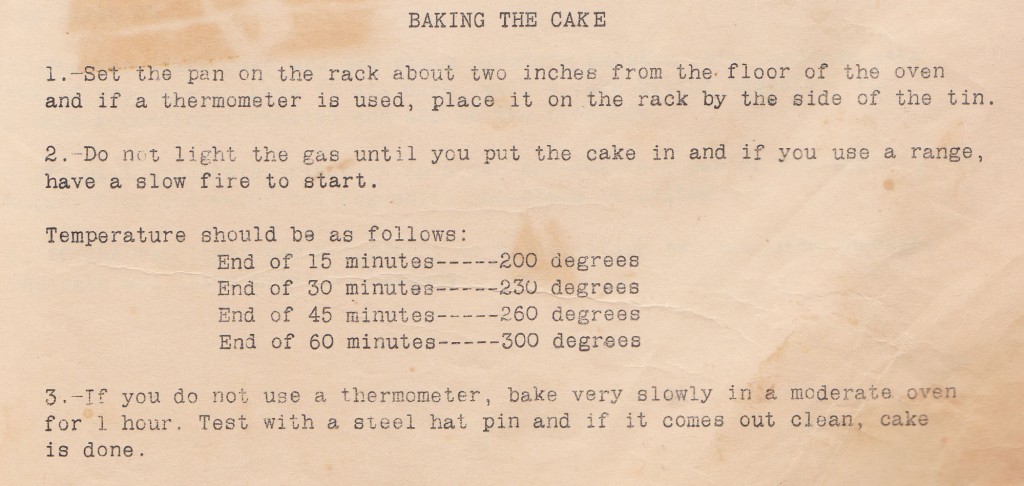
When completed, the batter tasted like hot fudge.  The cake showed promise.  But here comes round two, Baking the Cake.  Pay careful attention, it is detailed:

I ALWAYS managed to fuck this part up, because I forget to reset the timer.  That’s how the Puff Cake got overcooked and tough last time; this time I forgot to set the timer after 230 degrees.  So I went from 230 to 300 in the last 15 minutes. Grr.

The  results: the cake had a nice fudgy flavor.  I actually do not like chocolate cake (Short story: my mother was a prize baker, once she was testing a million chocolate cake recipes, I ate too much cake and puked.  Haven’t been able to stomach it since.)  but the flavor was rich enough I didn’t find it off putting.  But the texture was not great: although the top was most, the center and bottom of the cake was really dry and unpleasant.  That’s the same problem I had when I made the puff cake.

Mrs. Osborne’s ridiculous baking methods seem like they’ll be worth the trouble; they stink of some long forgotten baking secret.  But in reality, the long, low bake time seems to dry the cakes out.  Thumbs down, Mrs. O.

The History Dish: Birthday Cakes

It’s my birthday today!  So naturally, I got curious about the history of birthday cakes.  This is the earliest b-day recipe on the books, from Jennie June’s American Cookery Book, published 1870:

The “cakes” are actually cookies; but the most interesting part of this recipe is the directions to “sprinkle colored caraway seeds on top.”  Colored could perhaps mean “toasted.”  It could mean dyed with natural dyes. It could mean candied.

But does it mean that “colored caraway seeds” are proto-sprinkles?  Jimmies?  Hundreds and Thousands?

Thoughts?

At any rate, I decided not to make these cakes for my birthday: I anticipate them to be floury, dry, and full of currants.  Very 19th century and not my favorite style of cookie.  Instead, I’m baking an apple up-side-down cake and a plum cake, and my friend Jeffrey is arriving with a vegan delight.  The more cakes, the better, I say.

Cookie Week: Cardamom Rosewater Cookies


This will be the last post for Cookie Week, which will hopefully also allow me to stop devouring cookies.  I’m on holiday vacation through New Years, so my consumption of holiday treats is slackening at a snail’s pace.

But if you are going to make one more sweet this season, I’d recommend  these cookies.  They taste beautiful. 

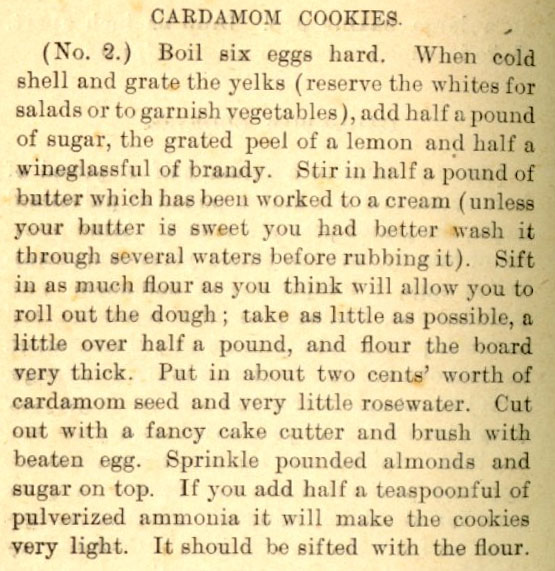
The original recipe is fairly complex.  Here:  

If anyone has an explanation for the grated boiled eggs yolks, I’d love to hear it.  Has anyone ever seen anything like it in a recipe before?  When my mother and I were doing some holiday baking, we experiemented with this technique in another cookie recipe and the result was revolting: dense, dry cookies with a distinctly hard-boiled taste (although roommate DK loved them).

But what I loved about this cookies recipe was the flavor combination: cardamom, rosewater, and brandy.  Definitely 19th century but daring to the modern pallette.  I decided to focus on the flavors of the recipe, not the technique, and retronovate a modern sugar cookie recipes to incoporate a taste of the past.

***
Cardamom Rosewater Cookies
Adapted from “Aunt Babette’s” Cook Book by “Aunt Babette”, c1889.
Modern recipe derived from Martha Stewart’s Cookies.

3 cups all-purpose flour
1 teaspoon baking soda
1/4 teaspoon salt
1 tsp ground cardamom
1 1/2 cups granulated sugar
1/2 cup packed light-brown sugar
1 cup unsalted butter (2 sticks), softened
2 large eggs
1 tsp rosewater
1 tsp brandy
Zest of one lemon
Sanding sugar, for sprinkling

1. Preheat oven to 350 degrees. Whisk flour, baking soda, cardamom and salt into a bowl; set aside. Beat eggs with rosewater, brandy, and lemon zest; set aside.

2. Using an electric mixer, beat sugars and butter at a medium speed until pale and fluffy. Add eggs until mixed. Scrape down bowl with a rubber spatula

3. Reduce mixer speed to low and gradually add flour mixture. Mix until just combined.

4. Scoop dough into a Ziploc bag or sheet of plastic wrap. Form into a ball and refrigerate for at least an hour.

5. Either roll dough into 1 inch balls and place on a baking sheet; or, roll and cut cookies.  On a generously floured surface, roll out 1/4 of the dough until it is 1/4 inch thick. “Cut out with a fancy cake cutter,” and place on a baking sheet.  Brush with egg white and sprinkle with sanding sugar and/or chopped almonds.

6. Bake for 7 minutes, turning half-way through.

***

This cookie isn’t for everyone.  It won’t satisfy your chewy/chocolate/nutty holiday treat cravings.  But the flavor is unique and surprising: a refreshing palette cleanser after a month of heavy eating.

The History Dish: Matzo Meal Pie Crust

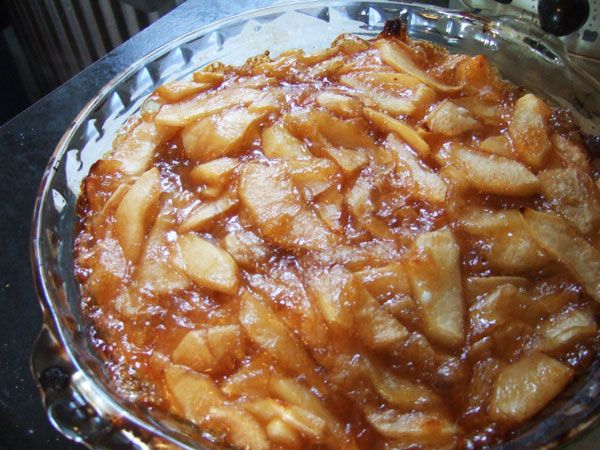
Apple pie with a matzo meal crust.

Back in September, I was asked to represent the Lower East Side Tenement Museum at Apple Day.  Apple Day pays tribute history of the Lower East Side, which in the 1700s was  part of Mr. Delancy’s farm and  included a sizable apple orchard.  My assignment was to feature apple dishes that reflected the neighborhood’s immigrant history.

I was immediately put in mind of a cookbook I’ve talked about before: Ba’á¹­am’á¹­e Yidishe maykholim; or, Tempting Kosher Dishes.  The book is now online thanks to the Steven Spielberg digital Yiddish library.

Ba’á¹­am’á¹­e Yidishe maykholim is a perfect example of Americanization and assimilation through the dinner table.  Released by the Manischewitz company in 1944, the slender cookbook is written in both Yiddish and English and features Kosher for Passover recipes for classic American dishes like Boston Cream Pie.

Someday soon, I will cook many more recipes from the book. But on the morning of Apple Day, I decided to tackle Matzo Meal Pie Crust.

This recipe starts wierd and gets weirder.  I put my matzos in a bowl and covered them with water until they got squishy; then, with my hands, I tried to squeeze out as much water was possible.  The result was a pile of moosh.  Why I had to do this, I’m not sure, because the next step is to dry the matzos back out.

I toasted the matzos in a skillet.  The recipe requested I use “fat” which means “schmaltz” which means “chicken fat,” which sadly I didn’t have.  So I used a tablespoon of Crisco instead.  Crisco is also kosher and released their own bi-lingual cookbook.

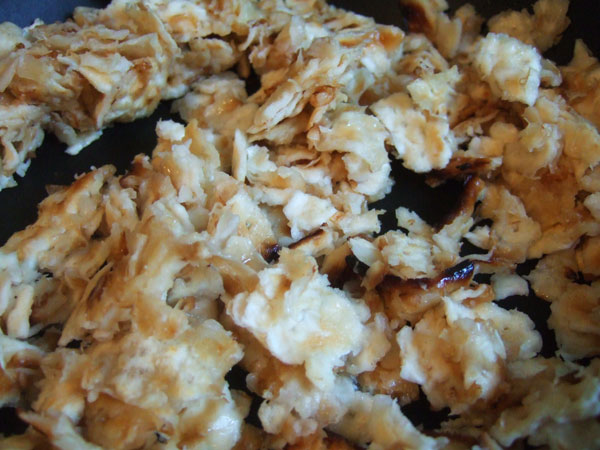
I toasted the matzo crumbles until they  looked dry:

Matzos wet, then dried again, in a skillet with Crisco.

The next step in the recipe is where things took a turn for the worse.  I mixed the toasted matzo crumbles with all the other ingredients which turned it back into moosh. Really runny moosh.  There was no way I could “press it into a pie plate with hands” because it was just liquid.  A mess.  It occurred to me I was using large eggs and perhaps medium eggs were a more appropriate size.  So I decided to scrap my messy disaster and start all over, from the top, with new matzos soaked in water.

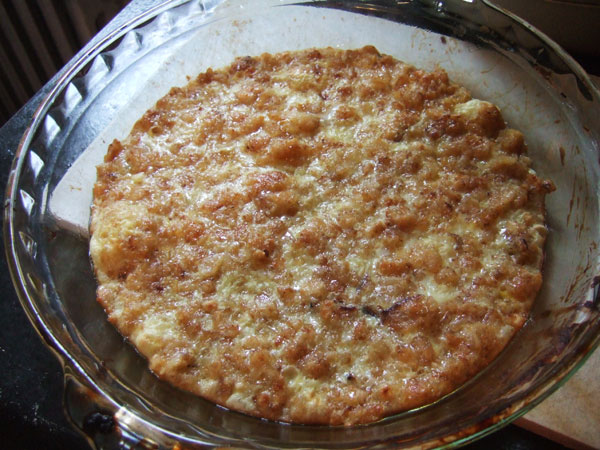
I made you puke pie.

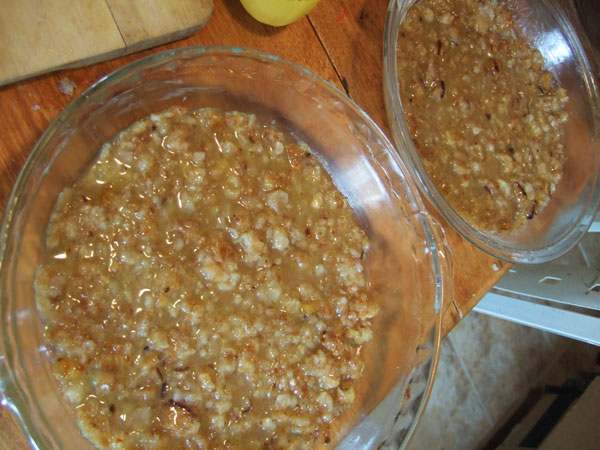
The second time around I used one egg instead of two and it was still a runny, goopy mess.  Usually, when something I make looks that much like puke, I call it quits.  But the fact of the matter was I had to be at Apple Day in about two hours.  So I poured my goop into two pie plates and slide it in the oven to pre-bake it before the filling went in.

I put it in at 350 degrees for about 20 minutes.  In the meantime, I prepared a basic apple filling.

When I took the crust out of the oven, it looked better, but still suspect.  It had, a least, formed into something crust-like.

I poured in the apple filling and put it back in the oven for another 15 minutes.  This time, when it came out, it looked rather glamorous.  I wrapped it up and carted it off to Apple Day.

In the end, this crust was a real surprise.  At the event, I cut the pie and scooped out a serving to taste test.  The crust was almost meringue-like: sweet and crunchy, but a little chewy, too.  Like apple pie over macaroon cookies.  Really, really good.

To be honest, I’d make this crust again, although I’d try to figure out if I could cut out some of the mush to dry to mush to dry steps.  It was a real shocker that something that looked so much like a throw-up could end up tasting so delicious.

Retronovated Recipes: Make Yourself a Ham and Apple Cornbread Sandwich

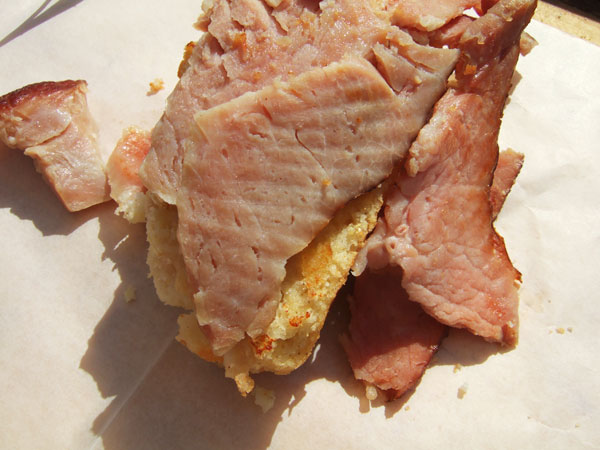
Toasted apple cornbread, melted butter, and hot ham.  Sound ok to you?

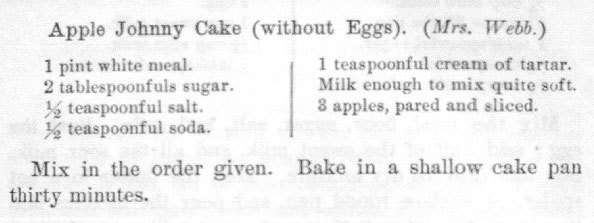
I served this delicious sandwich at an 1864-style baseball game where  I was charged with providing a few period-appropriate concessions.  I was inspired to create this flavor combo after stumbling across this recipe (albeit from 1884) from Mrs. Lincoln’s Boston Cook Book for Apple Johnny Cake:

Apples stirred in to cornbread? Awesome!  Why had I never heard of this before?

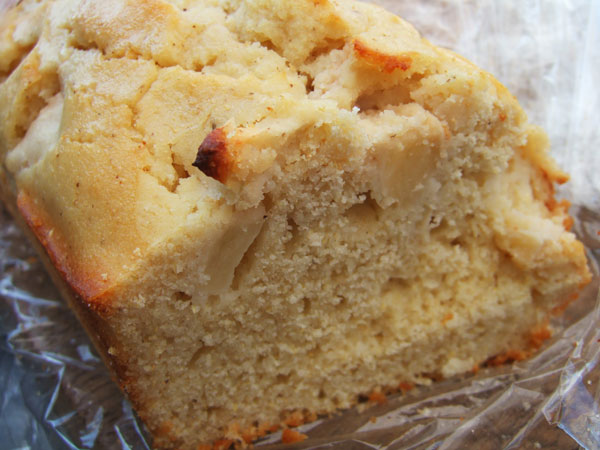
I initially made the cornbread according to the historic recipe; it was very dry, grainy, and crumbly.  Not pleasant. I prefer a cakier, modern cornbread.  So I retronovated: I grabbed my favorite contemporary cornbread recipe (Mark Bittman’s) and folded in about a cup of chopped apples at the end.

A cross section of cornbread and apples.

Cornbread and ham were common foods served at fairs and political rallies in the 19th century, so it only made sense to pair my apple cornbread with a thick slice of ham.  At the baseball game, I toasted the cornbread on a griddle and heated a slice of ham alongside.  The cornbread got a healthy smear of fresh, handmade, sooo-yellow butter I got at Saxelby’s Cheese in the Essex Street Market.  Seriously, one forgets how yellow fresh butter is.

Anyway: cornbread, butter, and hot ham on top.  It was a damn good sandwich.

Events: New York Cookies


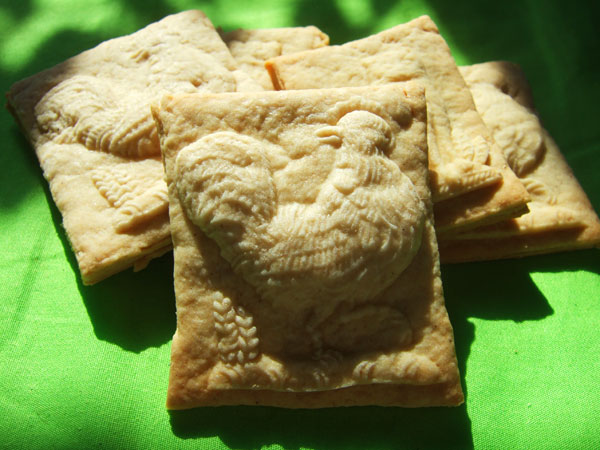
Traditional New York Cookies, stamped with historic Rooster and Kitty stamps.

I spent last Sunday morning at Old Stone House, stamping out cookies with the local kids of Park Slope.  The stamps are historic replicas from House on the Hill and are just. beautiful.  I was shocked at the level of detail the molds yielded; although I used them with 19th century cookie recipes, I think they would work well with most modern sugar cookie dough.

Stamped cookies are a tradition early Dutch settlers brought to New York (nee New Amsterdam).  Over the years, they became known as a New York tradition that transcended immigrant groups.  In the city, stamped cakes were passed out as treats on New Year’s Day, and as a memorial token at funerals.


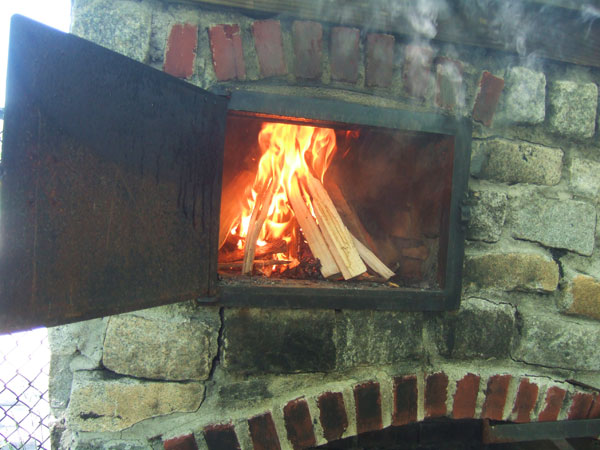
Heating up the hearth at Old Stone House.  I lit a large fire and let it burn down to red and white hot coals.  Then, I pushed the coals to the back of the oven, and placed the cookies in the front.  To test the oven, I made Tollhouse break and bake cookies, and they baked exactly as long as they said they would on the package.  Voila!


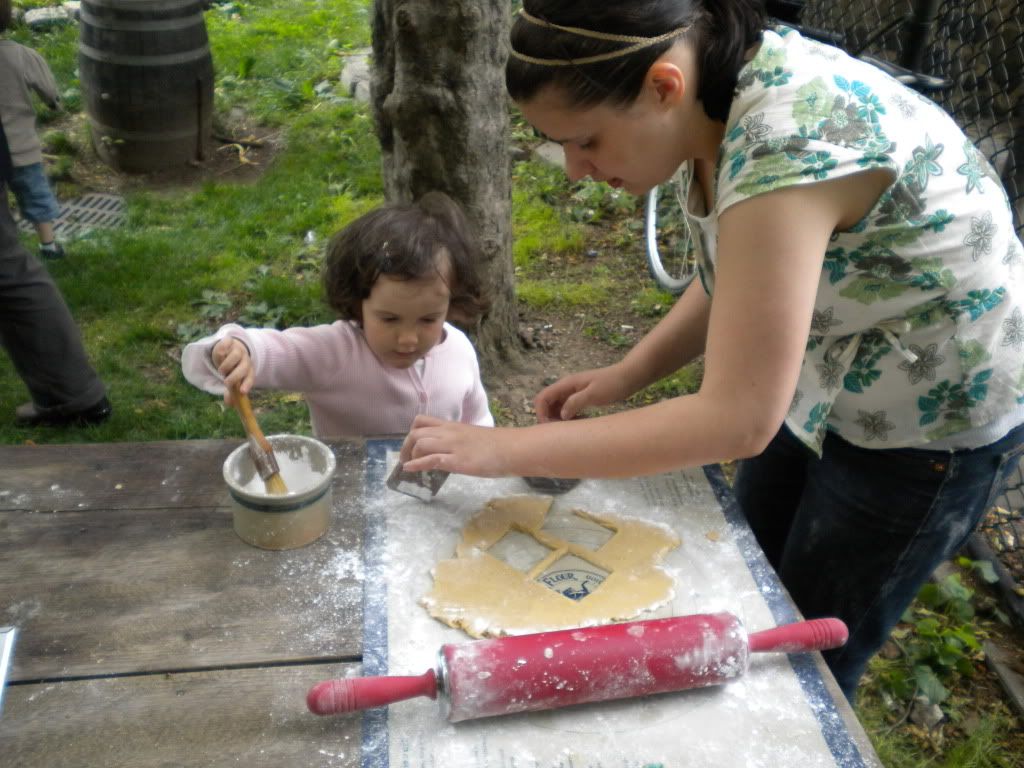
A teeny helper dusts confectionar’s sugar in the mold.  The sugar stops the dough from sticking, and delivers a more detailed image.  Photo by Sharon Stadul


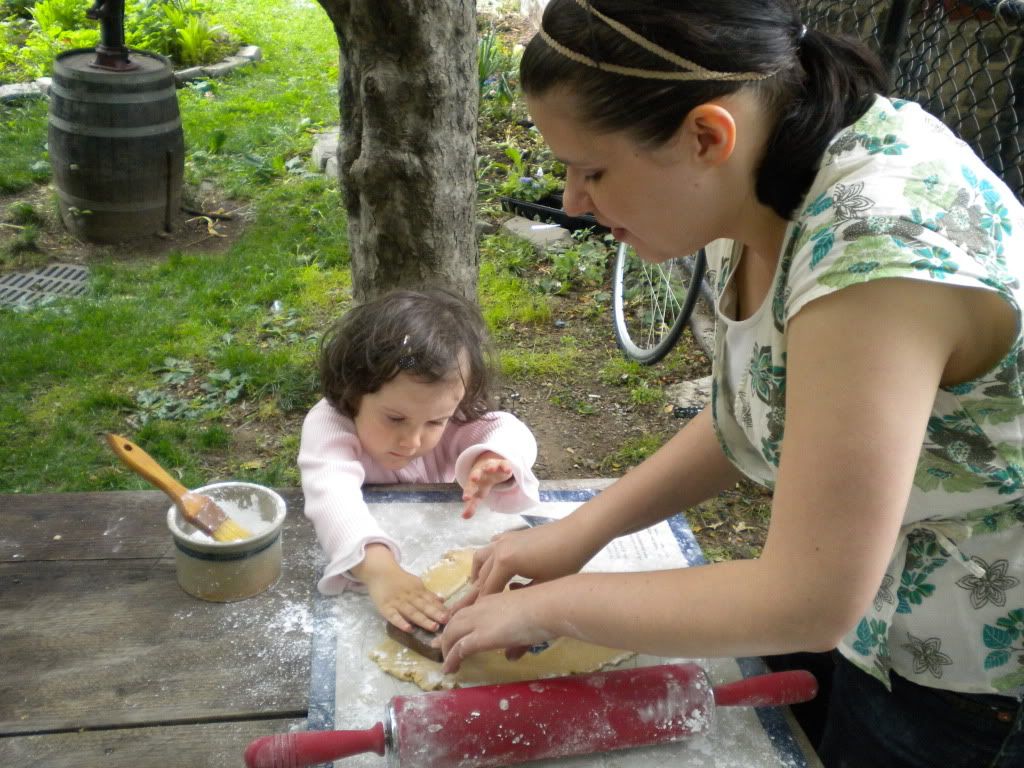
And then we stamp.  Photo by Sharon Stadul.

We made two cookie recipes on Sunday: one, a caraway and orange cookie, came from the book Food, Drink and Celebrations of the Hudson Valley Dutch by Peter G. Rose.  Man they were good – I want to experiment more with that recipe.  The second cookie was a nutmeg-cinnamon-rosewater cake called, appropriately, New York Cookies.  The recipes is from 1840 and I give it a B+.  You may like them, particularly with a cup of tea, but they taste too much like the 19th century for my liking.

***
New York Cookies

From Directions For Cookery, In Its Various Branches by Eliza Leslie, 1840.

1 cup cold water
1/2 pound sugar
2 ounces rosewater
3 pounds flour
1 nutmeg
1 tsp cinnamon
1 teaspoon baking soda
1 pound butter
1. Preheat oven to 375 degrees. Whisk together flour, spices, and baking soda.
2. Using your hands, rub the butter into the flour mixture until it forms a course meal.
3. Combine rosewater, water and sugar. Add to flour mixture and knead, first in the bowl, then move  to a board, cloth or non-stick mat dusted with confectioner’s sugar.  Knead until the dough no longer crumbles, adding additional water if neccesary.
4. Cut into three pieces, setting aside two and rolling out the third.  This dough also freezes well if you don’t want to make the cookies immediately.
5. Roll the dough 1/2 in -3/4 of an inch thick.  Using a pastry brush, dust cookie mold with powdered sugar. Press cookie mold firmly and evenly on the dough.  Lift up mold, and cut out cookie using a spatula or a knife.
6. If possible, let the cookies sit out for an hour before baking.  Letting the cookies dry slightly also delivers a crisper image.
7. Bake for 15-20 minutes.

***

Retronovated Recipes: 400 Years of Apple Pie — Bonus Feature!!

I want to follow up on my apple pie exploration with this little gem: my roommate reading aloud the 1615 Pippin Pie recipe.

Enjoy.